Canva, one complete design toolbox, now accepted by amateurs to professionals.
Correctly scaling your visuals is an essential aspect of any activity, whether you are producing social media graphics, lectures, pamphlets or blog imagery.
In this comprehensive guide, you will learn how to resize an image in Canva with step-by-step instructions as well as some best practices, major pitfalls to avoid and design advice from professional graphic artists that will keep your finish uniform across all platforms.
Why Image Resizing Matters in Canva?
Every platform has its own image size requirements. Instagram likes square or vertical images, blogs often need wide featured images, and presentations depend on fixed PowerPoint dimensions. If you don’t size the images correctly, they will be stretched, blurry, or crop awkwardly to the point where details significant for our content can become completely hidden in white space or not appear at all.
When you learn how to resize an image in Canva one of the things you gained is:
- Professional looking designs on every platform
- No important elements are cut off
- Be sure file size remains optimized
- Branding is always consistent
Even if you have never had any design experience, it is incredibly easy to resize an image in Canva. Also, you can check out the article on – How to resize an image in Microsoft Word.
Understanding Canva’s Canvas vs Image Resizing
Before we begin, it’s important to understand an important concept in this: when we resize the entire image and when we resize an individual part of that image/canvas itself. The two are not synonymous.
- When we resize the canvas, the entire design is enlarged or reduced, as when a painting stretches across two frames on display outside the street.
- When we resize the image, whether it is a photo or one piece of design within this total project size to which we have added new elements as a background or editorial note–at this moment in time we are only changing that single element inside our picture.
This article covers both, so by the end you should be clear at least in theory how to deal with all of these situations.
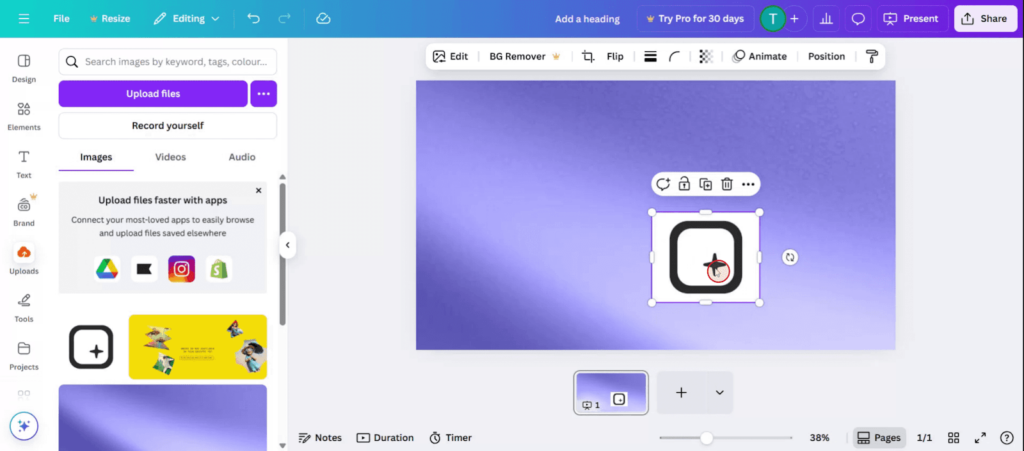
#1: Resize an Image Directly on the Canvas (Drag & Scale)
It’s the most common and easy way for beginners.
Follow the Detailed Instructions:
- Open Canva and start on your design.
- However if you click to select the picture, small white handles will appear at the edges and corners.
- Drag one of the corner handles in or out to resize, you’ll notice that all aspect ratios are maintained.
- Let go of the mouse when you feel satisfied
Pro Tip
Keep the corners smooth and consistent when doing your repose. Corner Resizing maintains aspect ratios and avoids distortion.
This method is a good choice when you just want to expand or shrink an image within an existing layout of design. It’s the most common and easy way for beginners.
#2: Resize an Image Using the Toolbar (Precise Control)
Canva’s toolbar offers you more control, perfect for people seeking pixel-by-pixel accuracy.
How it Works:
- Select the image chosen
- Click Position on the top toolbar
- You should find Width (W) and Height (H) values
- Input your exact size manually
- Unlock or lock the proportions to suite your need
This is an effective approach when:
- You’re preparing ads which have clear rules about their size.
- You want images of one size to appear across many nearby pictures.
- This approach allows you to match your materials to the guidelines that your company gives for how it should be presented.
Mastering this method is one of the most important parts of knowing Canva’s image resizer like a pro.
#3: Crop Before Resizing for Better Composition
Sometimes resizing alone isn’t enough, so let’s try another way. Some cropping helps to concentrate attention on the most important part of our picture.
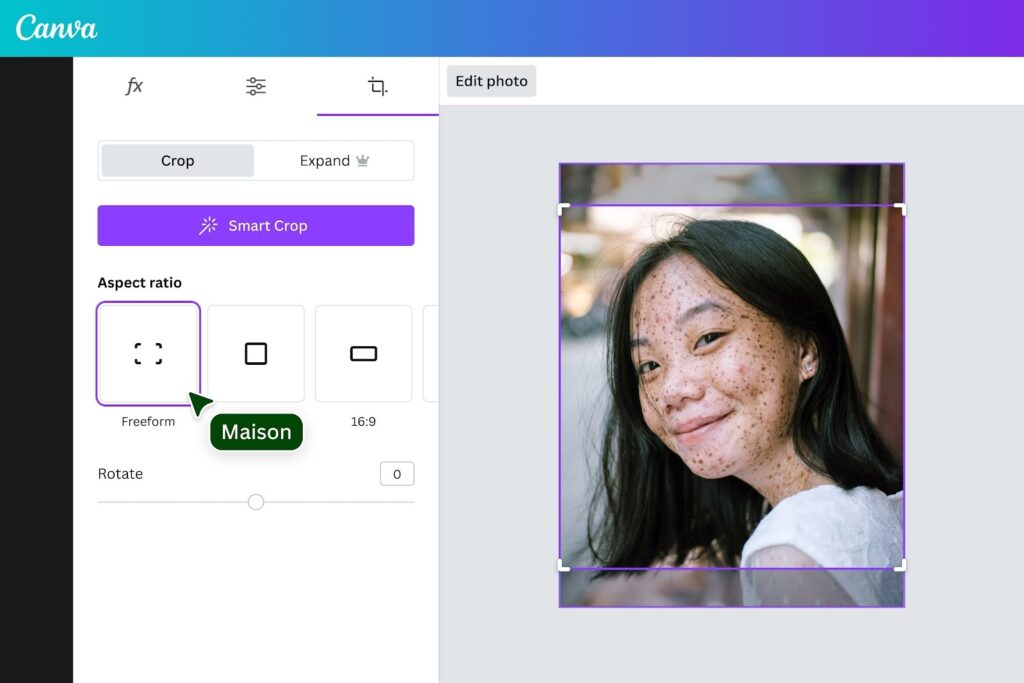
How to Crop the Picture in Canva:
- When crop mode is selected, click the folder that contains the image
- When the image is open, click Crop
- Drag within the frame and select an area
- Click Done and save
Cropping Before Resizing
It’s best to crop first, then reduce the image size. That way, things won’t get awkwardly framed. (And you’ll still have your subject in view for that matter!)
#4: Resize the Entire Design Using Canva Resize Tool
This powerful feature of Resize (available in Canva Pro) allows you to adapt designs for multiple platforms.
Steps to Resize the Canvas:
- Click Resize in the top toolbar
- Choose a preset (Instagram, YouTube Thumbnail, Blog Banner)
- Or enter custom dim
- ensions
- Click Resize or Copy & Resize
This doesn’t just explain how to resize an image in Canva, but how to repurpose designs effectively.
#5: Resize Images for Social Media Platforms
Each online platform has its own preferred image sizes.
Common Canva Image Sizes:
- Instagram Post: 1080 × 1080
- Instagram Story: 1080 × 1920
- Facebook Cover: 820 × 312
- YouTube Thumbnail: 1280 × 720
- Blog Featured Image: 1200 × 628
Wouldn’t it be better for you to use existing settings to achieve desired results? Canva’s presets mean resizing can be done reliably and accurately.
#6: Resize Images Without Losing Quality
One common point of concern is image quality. A rough resizing can lead to blurred images.
Best Practices:
- Use High-Quality Images
- Do not enlarge small images too much
- Use Canva‘s Smart Crop whenever you can
- Export files in their appropriate format (PNG for graphics, JPG for photographs)
By taking these steps, you can learn how to resize an image in Canva correctly without any loss of quality.
#7: Resize Multiple Images at Once
This saves time and keeps layouts visually balanced.
When dealing with mass productions, problems involving misalignment are going to come. However:
How To Keep Image Sizes Uniform?
- Perfectly resize an image
- One perfect copy
- Use the Replace option to modify image
- Canva then retains the original portrait dimensions.
This not only saves time, but also ensures that all layouts of Canva look attractive.
Common Mistakes to Avoid When Resizing in Canva
Even when you have Canva to help you out, it’s not always smooth sailing.
Avoid the Following Errors:
- Stretching images with their left or right edges
- Enlarging low-resolution photos
- No to safety margins
- Ignoring different platform size requirements
- The wrong output format
If you’re to learn effectively how to resize an image in Canva, it’s essential understand these errors.
Advanced Tips for Professional Results
For designs that you want to become different from the others:
- Layouts using grids and frames for consistent resizing
- Enable rulers and guides
- Lock background layers, resize foreground images
- Create Product Visuals Using Smart Mockups
These are some advanced techniques that add a new level of quality to your design.
When to Resize Vs Redesign?
Sometimes resizing isn’t enough.
Resize When:
- Only dimensions change
- Content fits naturally
- Layout remains balanced
Redesign When:
- Text becomes unreadable
- Important elements get cropped
- Platform orientation changes drastically
This is important to know especially when you learn how to resize an image in Canva.
How to Resize Image in Canva? (Free & Easy Option)
If a cheap and quick solution is what you’re after, then Oualator Image Resizer is an example of such. Where Canva excels in full-blown designs, there are times you only want to proportionately increase a picture and leave out the layout, text or templates. This online application does just that.
It works straight within your browser—and without login, no watermark and no need to learn. You simply upload your image, enter the desired dimensions, or resize by percentage when needed; then click to download your resized file immediately–with no fuss of any kind whatsoever from start to finish! It will be particularly useful for users who have already worked out how to resize images in Canva but are looking for a faster single-piece solution that is suitable even for basic resizing tasks.
Key Features of this Online Application:
- You are completely free to use with no account required
- Custom width and height, or percentage resizing of images
- Popular formats like JPG, PNG and WebP are all supported
- Fast processing with download that is instant
- This is a clean interface that is amenable to beginners.
- Resized images no longer carry a watermark
- Works on desktops and mobile browsers
Why this Utility is Better in Some Cases?
While Canva shines as a design platform, in certain cases aforementioned tool has a distinct advantage. Let’s find out from the following:
Simple Jobs Get Done Faster
If all you want to do is adjust the size of an image, this online application can be quicker. You don’t have to open up a design, set the canvas size and export, just upload, resize and download.
Completely Unrestricted Free
Canva ‘s advanced resize features (such as resizing entire designs) need a Pro subscription. However, the free image resizing provided by this application makes it very economical.
No Design Experience Necessary
Knowing how to resize an image in Canva like a pro is an advantage, but for beginners perhaps design tools themselves are still overwhelming. The software eliminates all complexity.
Ideal for Bulk and SEO Workflows
The tool is more efficient for bloggers, SEO professionals and developers who are continually resizing images on their websites than repeatedly opening Canva.
Canva vs Oualator: When to Use Which?
- When you need things like layouts, text, branding, or platform-specific design, you can use Canva.
- When you need only simple, fast image compression, you can use the above-mentioned tool.
Using both gives you the best of both worlds–you can use Canva for creativity and Oualator for speed. In other words, you are always using the right size of anything, even after you have learned how to resize an image in Canva.
Final Thoughts
Resizing images is about more than just dragging corners. It’s about preserving quality, preserving composition, and making designs that work on various platforms. This is where Canva comes into play, simplifying the entire process and making it available to everyone from beginners to pros.
Now that you know what you need to do, you can resize an image in Canva according to the above-discussed situations. Whether it is editing a single picture, resizing all elements on a page or preparing visual content for social media, blogs and presentations.
An experienced technical content writer with expertise in crafting insightful technology blogs. He studies emerging trends, analyzes tools before drafting, and ensures every piece reflects the latest innovations. His content blends clarity, research, and up-to-date technical understanding.