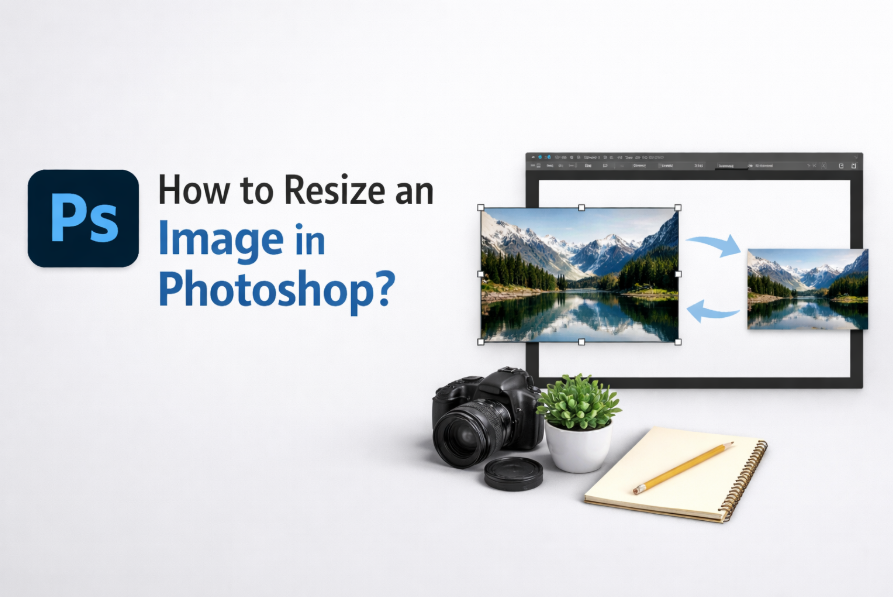
If you are working with digital visuals, you need a skill to resize images in your work routine. And for there is no other app better to use, i.e., Adobe Photoshop. You could have multiple reasons, like preparing images for the web, printing, or adjusting the resolution of the image. Photoshop is the key contributor in this attempt. Also, Photoshop has a lot of advanced features that you can use to resize images without losing image quality. All in all, in this guide, you will come to know the process of resizing an image in Photoshop using both pixel and percentage-based adjustments.
Why You Might Need to Resize an Image in Photoshop?
Now, before going through the steps, the first thing that comes to mind is, why do we even need to resize an image:
For web purposes: The size of the image gets smaller, which means the page opens faster.
To print: Images resized to proper dimensions for printing are crisp and clear.
For Social Media: Other platforms, such as Instagram and Facebook, often have their own size restrictions.
Email: Little images are easier to distribute and take up less space.
How to Resize an Image in Photoshop with Complete Steps?
This section will teach you the exact way to resize a photo in the Photoshop application without losing the quality or distortion. Here are the steps:
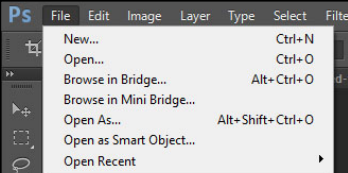
Step 1: Open the Image in Photoshop
The first step for resizing an image in Photoshop is opening your image that you need to resize. Now, open up Photoshop, select File from the top menu, and click on Open. Select the image from your file that you wish to resize.
Step 2: Access the Image Size Dialog Box
After opening your image in Photoshop, go to the Image tab in the upper left corner of the screen. Go to the dropdown menu, click Image Size…. After that, the Image size dialog box will open, and you will be able to change the size of your image.
Step 3: Adjust the Dimensions
When the Image Size dialog box opens, notice the two main fields you can change: Width and Height. These values are changeable in pixels, inches, or other units of measurement as per your requirement.
For Web/screen: Measurement is done in pixels.
For print: Inches or centimeters, depending on your printer
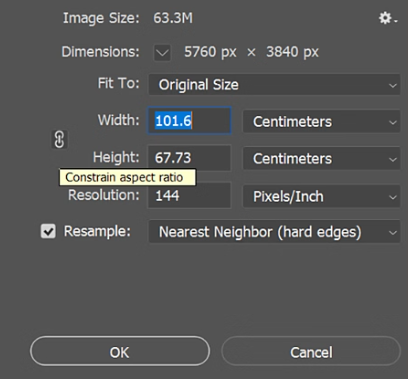
You can also specify the Resolution in this section (PPI — Pixels Per Inch). Web images work well at low resolutions; however, printing requires higher resolutions (300 PPI or above).
Step 4: Maintain Aspect Ratio
Check Constrain Proportions to keep your image looking proportional when changing its size. Moreover, this makes sure, when you change one dimension (width or height), the other responsively adjusts. However, you can also deselect this box if you want to stretch or squish the image but not proportionally.
Step 5: Resample the Image
In the Image Size dialog box, you will find the Resample check box. This option determines how the Pixel data will act when Photoshop goes to resize the image. In case you are resizing to a smaller image file, Photoshop reduces the file size by throwing away pixels. Photoshop will then try to fill in pixels from the others — if you are upsizing the image. For more info, you can check here.
There exist some types of resampling, such as:
Auto: Photoshop automatically selects the optimal method.
Bicubic Smoother: Best for enlarging.
Best for when scaling down images and keeping the edge details sharp.
Automatic will work just fine for the most part, but you will want to try a few of these options to get the best result for the image in question.
Step 6: Preview Your Changes
After you update the width, height, and resolution, save the image size using the OK button. If you don’t like what you see, press Ctrl + Z (Windows) or Cmd + Z (Mac) to undo and try the same process.
Step 7: Save the Resized Image
Once you are happy with the new size of your image, save it. To save a new copy of the image based on those dimensions, go to File > Save As. Select the suitable file type, like JPEG, PNG, or TIFF, depending on what you need it for.
Pro-tip: When saving an image for the web, also use Save for Web File > Export > Save for Web (Legacy). This helps you further make the image optimum for fasting or responsiveness without losing the quality.
Mistakes When Resizing Pictures In Photoshop
Although learning to resize an image in Photoshop is simple enough, you might run into a few common problems:
Drop in quality: When expanding an image, it can be pixelated or blurry. When enlarging, always begin with the original image; the higher the resolution, the better.
Aspect ratio issues: If you untick the box “Constraint Proportions,” you may stretch/distort the image. The box is ticked, and so always ensure it is, unless you are trying to change proportions.
Image File Size: Resizing images can have an impact on the file size, and this is especially true for high-resolution images. There is the option of Save for Web to have a smaller size with lower quality.
Resize a Single or Multiple Images at Once without Photoshop
If you still don’t have Photoshop installed or want a quicker online solution, the Oualator Image Resizer is your best option to resize your images directly online. Further, this is a very simple tool that works directly in your browser, perfect for beginners. On the other hand, it is a good fit for users who want something quick or on a machine without Photoshop. Next, we will see how to resize an image using Oualator:
- Visit the tool: https://oualator.com/conversion/image-resizer/
- Click on the Upload Image button to upload your photo.
- Put in your target size or simply choose a preset if you know the size you need.
- Check the Maintain aspect ratio to preserve the image size.
- Next, click on the Resize Image button to resize the selected image.
- Finally, download the resized image instantly.
Why Oualator is a Useful Photoshop Alternative?
- No installation required
- Ease of use: Works on any browser (PC, Mac, or mobile)
- It recognizes common formats such as .jpg, .png, .webp, and more.
- Fast for web & social media & blogging resizing
- 100% free to use
This online application is a good alternative to Photoshop if you want a little speed and convenience. It is for simple resizing jobs that do not need professional offline software.
Final Takeaway
Understanding how to resize images in Photoshop is an essential skill, whether you are a digital designer, photographer, or social media manager. With these simple steps, you will be able to change the resolution of your images while keeping the quality intact. Whether you want to resize images to use on the web, print, or social media, Photoshop has powerful features to help you size images correctly. Overall, play with the various settings, and you will soon become proficient at resizing.
A technical content writer specializing in in-depth tech blogs, she tracks evolving technologies and industry shifts. Before writing, she leverages advanced tools for research and validation. Constantly updating her knowledge, she delivers accurate, trend-driven, and future-ready content for digital audiences.