Adobe InDesign is widely used as the industry standard for designing professional layouts, like magazines, brochures, posters, eBooks, and print-ready materials. During the design process, the most common tasks are resizing images correctly without affecting the quality of the images or disturbing the layout. InDesign maintains images as linked elements placed within the frames, which means resizing affects both the image and its container. This guide on how to resize an image in InDesign will tell you every method from basic to advanced, so you can always stay in control of your design.
Difference Between Frames vs Images in InDesign
Before resizing the images, it is important to understand how InDesign maintains images. Every image you place in InDesign sits inside a frame. You can resize the images using:
- The frame only
- The image inside the frame.
- Both together
This double structure gives designers the flexibility, but it can confuse beginners who want to resize their images. Learning this concept is the base of mastering how to resize an image in InDesign without distortion.
Step 1: Placing an Image in InDesign
Before resizing the image, you need to place the image correctly in InDesign. Below are the steps given:
- Firstly, open your InDesign document.
- Then, click on the File and then Place.
- Now, choose your image and click on the Open button
- At last, click or drag on the page to place the image.
Once the image is placed, you’ll see a bounding box indicating the image frame.
Step 2: Resizing Only the Image Frame
Sometimes you want to change the layout spacing without changing the image scale. The steps are:
- Firstly, choose the Selection Tool (V).
- Click on the image frame.
- Drag any corner handle to resize the frame.
This will crop or reveal more of the image without changing its size.
This step is useful when you want to align images within grid-based layouts or magazines.
You may find the other blog informative, i.e., how to resize an image in GIMP.
Step 3: Resizing Both Image and Frame Together
Follow the steps to resize an image in InDesign via both the image and the frame:
- First, choose the Selection Tool (V).
- Next, hold Ctrl + Shift (Windows) or Cmd + Shift (Mac).
- Finally, drag a corner handle.
This is the safest and most commonly used method for resizing images in InDesign without losing quality.
Step 4: Resizing the Image Inside the Frame
This method works well when you want to make small, precise adjustments to the layout. To use, go through the steps:
- First, tap the image once to choose the frame.
- Click the image again until the Content Grabber (doughnut-like circle) appears.
- Finally, drag the image handles to resize only the image.
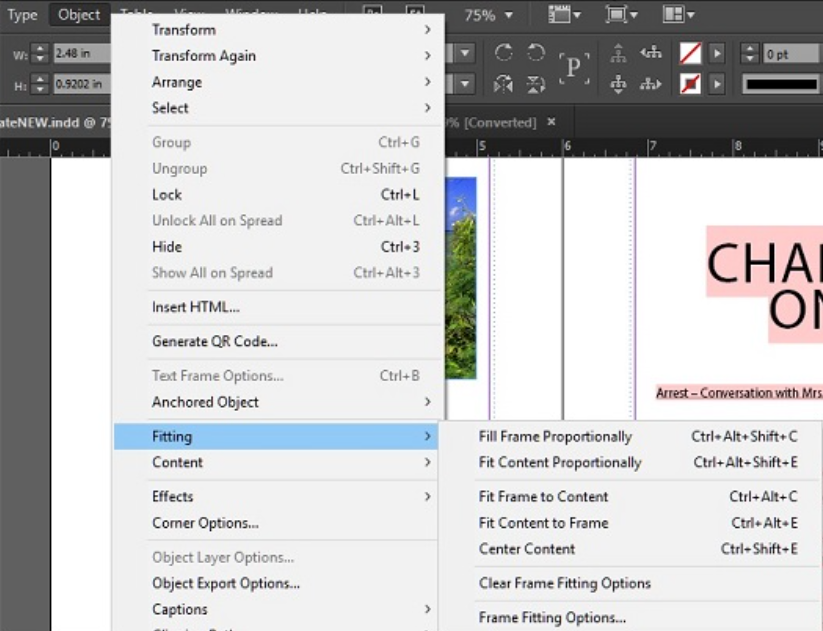
Step 5: Resizing Through the Fit Options
InDesign offers automatic fit options that help to save time.
- Right-click on the image.
- Choose Fitting.
- Select from:
- Fit Content Proportionally
- Fill Frame Proportionally
- Fit Frame to Content
These options are extremely helpful when working with multiple images and learning how to resize an image in InDesign efficiently.
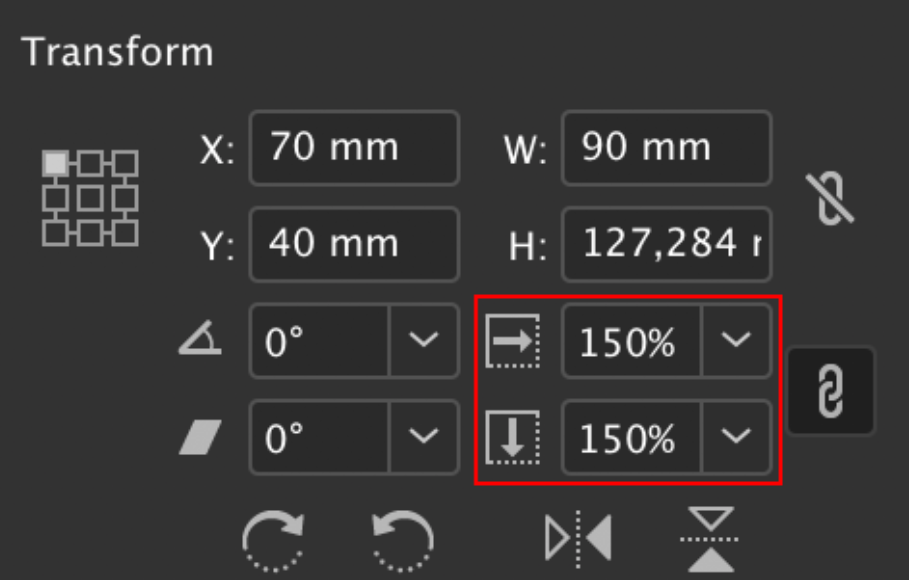
Step 6: Resizing Using the Control Panel (Precision Method)
This method is useful for print projects that need strict sizing. And also for the exact size:
- Select the image or frame.
- Go to the Control Panel at the top.
- Next, enter the values of width and height.
- Finally, turn on the chain icon to keep the proportions intact.
Step 7: Avoiding the Image Quality Loss
A common mistake users make while resizing images is stretching the low-resolution files.
Pro Tips that work well:
- Always use high-resolution images, mainly 300 DPI for print.
- Avoid the scaling of images above 130%.
- Check the Links Panel for PPI effectiveness.
These tips are important when you are learning how to resize an image in InDesign for a professional workflow.
Step 8: Resizing Multiple Images at Once
To resize several images together:
- Select multiple frames using Shift + Click.
- Hold Ctrl/Cmd + Shift.
- Drag a corner handle.
This technique is useful for catalogs, grids, and social media layouts.
Common Mistakes to Avoid
- Stretching images without holding Shift
- Scaling raster images too much
- Resizing the frame instead of content unintentionally
- Ignoring effective PPI warnings
Avoiding these errors improves your confidence in how to resize an image in InDesign for both digital and print designs.
Resizing of Single or Multiple Images without Adobe InDesign
If you don’t have Adobe InDesign installed or simply need a faster, online solution, Oualator Image Resizer is the best alternative solution for resizing images online. While InDesign is best for professional layouts and print workflows, Oualator entirely works in your browser and is perfect for quick image resizing tasks.
This tool is especially useful for users who are working on lightweight systems, shared computers, or those who only need to resize images before placing them into an InDesign document. Steps are:
- Go to the above shared link in your browser.
- Next, click the Upload Image option and select one or more images from your device.
- Now, put the desired width and height, or choose a default size.
- After that, enable the Maintain aspect ratio to avoid image distortion.
- Henceforth, click on the Resize Image option to load the image instantly.
- Finally, download the resized image and add it to your InDesign layout.
This workflow is useful and simple when you want properly sized images before importing them into InDesign, which helps you to keep your document lightweight.
Why Oualator Is a Useful Choice to Resize an Image in InDesign?
When it comes to the optimal prep of images for publication, this online tool is a much more versatile option. This tool is known for its key features and benefits:
- It enables you to resize several images simultaneously, which saves time in cases involving multiple files.
- It also reduces file size before adding images to InDesign, which helps the document run more smoothly.
- This is best for preparing images for print, web, or social media.
- Also, allows for quick resizing of images without affecting the original file.
- No Adobe subscription required to use this pro solution.
- Simple and useful for collaboration where teammates don’t use InDesign.
This alternative tool might be a useful alternative for rapid image resizing, but Adobe InDesign is the better choice when a higher level of page layout control is required.
Wrapping Up
In this article, we have discussed on how to resize an image in InDesign, which can be an essential skill needed to create professional and visually consistent layouts. You will learn how to avoid the many drawbacks that lead to a loss of time by getting your frames, fit options, and accurate scaling correct, so your designs look professional in print and digital. After using the mentioned tool regularly, resizing images becomes just a matter of routine, thus speeding up the workflow and the general quality of the design.
An experienced technical content writer with expertise in crafting insightful technology blogs. He studies emerging trends, analyzes tools before drafting, and ensures every piece reflects the latest innovations. His content blends clarity, research, and up-to-date technical understanding.