Resizing images is one of the most frequent types of editing you will perform, whether that means preparing a social media post, optimizing a blog graphic, or preparing a unique design for print. PicsArt is one of the most simple, flexible, and really powerful tools on your arsenal for this — a photo editing app on mobile and web. By the end of this guide, you will understand proper how to resize image in picsart without losing quality, tips on how to resize image in PicsArt best practices along with common mistakes: how to avoid them. If you are a lightroom user, you can check the resize blog on How to Resize an Image in Lightroom.
Why Resizing Images Matters?
Now, we can get into the tutorial but first, let me tell you: Why do we need to resize?
- Faster Loading Times
- These images are smaller, which allows them to be loaded quickly on websites and apps.
- Perfect Fit for Social Media
- Make sure to follow the specific size that each platform has.
- Better Storage Management
- Optimized images have lower size,
- Improved Visual Quality
- Resizing properly prevents stretching and pixelation.
Getting Started with Resize image in PicsArt
PicsArt is a free app for Android, iOS, and web browsers. It offers:
- Simple drag-and-drop interface
- Preset canvas sizes
- Custom pixel resizing
- Aspect ratio lock
- Export in multiple formats
So, let me go through the steps with you real quick.
Step 1: Open PicsArt and Upload Your Image
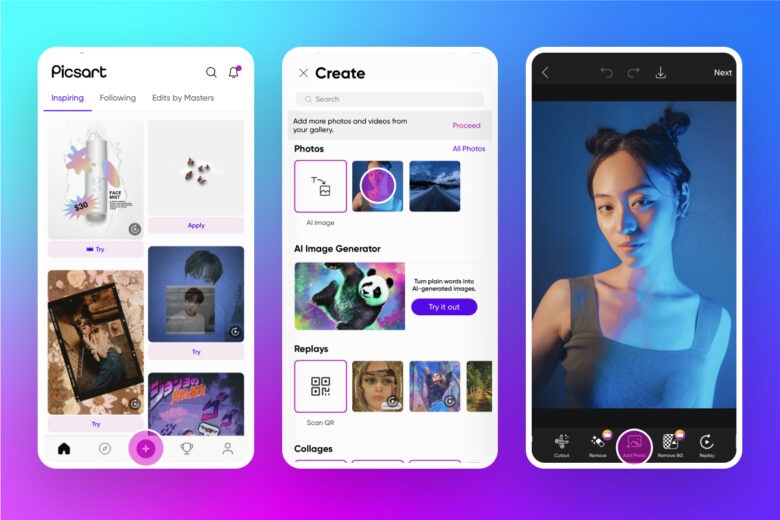
What to do:
- Launch the PicsArt app or website
- Tap Create or Edit
- Choose a photo to upload from your gallery or files
After your photo loads in the editor, you’re all set to resize it.
Step 2: Access the Resize Tool
How to find it:
- Tap on Tools (or find at the bottom of the toolbar)
Select Resize or Canvas Size
Here you’ll see options to:
- Change width and height
- Lock aspect ratio
- Switch units (pixels, inches, cm)
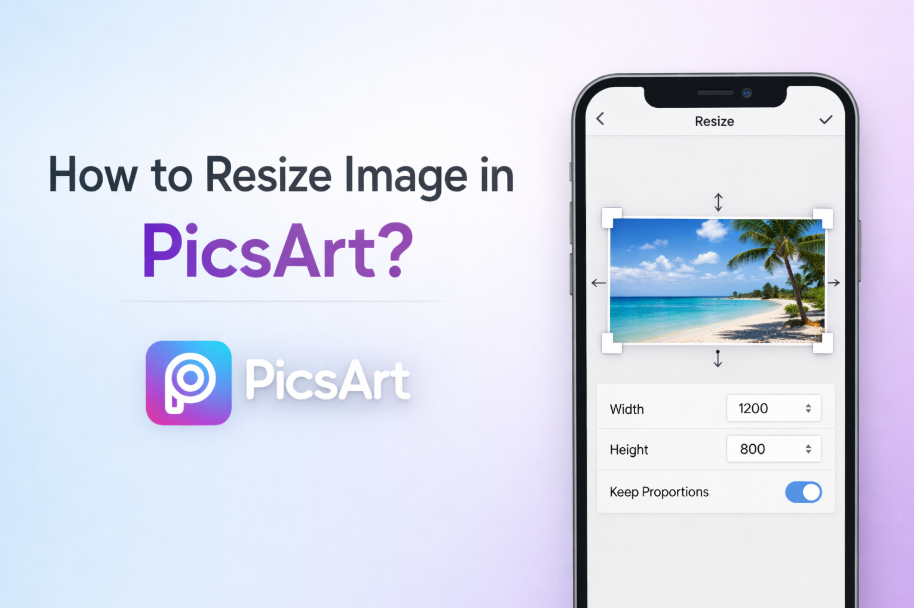
Step 3: Enter Your Desired Dimensions to Resize image in PicsArt
You can resize in three ways:
- Custom Size (Great for website & design)
- Set Pixel Width & Height Manually
Example:
- Instagram post: 1080 x 1080
- Story: 1080 x 1920
- Blog image: 1200 x 630
Maintain Aspect Ratio
Turn on the lock icon to ask for distortion.
Preset Sizes
In some editions, you have a facility for rapid layout sizes.
Step 4: Apply Changes and Adjust Composition
- Mistakes cause other’s loss:
- Reflection
- To Clip or Not all those Onscreen Elements
- For the Best Image, Please Choose
It is then unnecessary for anything important to be discarded and, of smaller necessity on an already perfect photograph.
Step 5: Save or Export Your Resized Image
Final steps:
- Press “Save” or “Export”
- Choose Format to Create Image
- Set Image Quality
- Download Now Or Share Now
Common Image Sizes You Might Need
| Platform | Recommended Size |
| Instagram Post | 1080 x 1080 |
| Instagram Story | 1080 x 1920 |
| Facebook Cover | 820 x 312 |
| YouTube Thumbnail | 1280 x 720 |
| Blog Featured Image | 1200 x 630 |
Pro Tips for Better Resizing Results
- Always Keep Aspect Ratio
- Stretched or Kinky Images
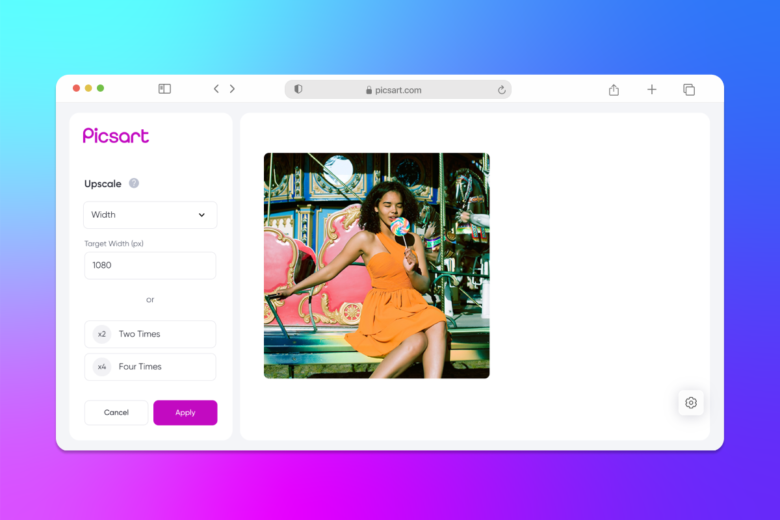
- Resize in, Don’t Out
- Upsizing cuts image quality
- PNG is for Pictures
- Better for logos and non-solid patterns
- JPEG is for Photos
- Smaller file size, but high quality
Mistakes to Avoid to Resize image in PicsArt
- Resizing multiple times repeatedly
- Enlarging small low-quality images
- Forgetting social media size requirements
- Saving at very low quality
Can You Resize Images in PicsArt Without Losing Quality?
Yes — as long as:
- Instead of sizing up, you are sizing down.
- You export at high quality
- You keep aspect ratio locked
PicsArt has at its disposal smart resampling to maintain sharpness.
Mobile vs Web Version: Which Is Better?
Mobile App
- Faster
- Touch-friendly
- Great for social media
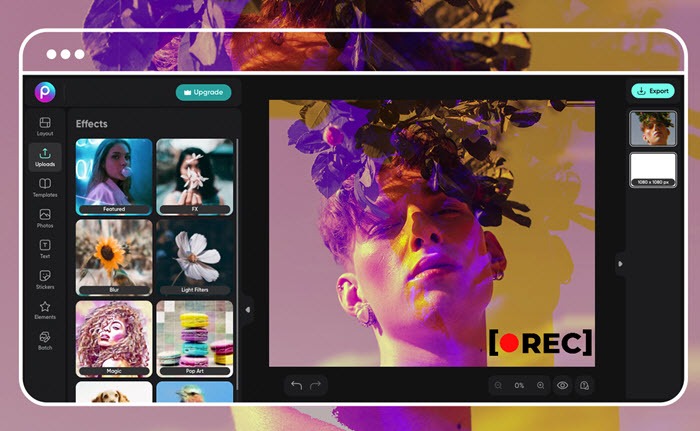
Web Editor
- Bigger workspace
- Easier precision resizing
- Great for bloggers & designers
Both work perfectly for resizing.
When Should You Resize Images?
- Before uploading to websites
- Before posting on social media
- When sending via email
- For printing projects
- For faster page speed
Quick Recap of the Process
- Open PicsArt
- Upload image
- Select Resize tool
- Enter dimensions
- Apply and save
That’s it!
How to Resize Image in PicsArt? (Free & Easy Alternative Option)
When you need a fast and free method to scale images—without starting any hardcore editing—then Oualator Free Image Resizer tool is a nice partner to programs such as PicsArt.
PicsArt is great for more creative edits, effects, and design work, but there are times when you just want a nice clean way to resize an image — no layers, no filters, no nonsense. This is where this online resizer comes in handy.
No login, no watermark and no learning curve — it works right in your browser. Upload your image, choose your size (or resize by %), and download your resized file in seconds (the whole process is just within a couple of seconds).
Good for those who know how to resize images in PicsArt but need a quicker, easier option for simple resizing.
Key Features of this Online Tool:
- Absolutely free — no sign-in required
- Custom width & height resize or Resize in percent
- Compatible with JPG, PNG, and WebP
- Instant processing and quick download
- Beginner-friendly, clutter-free interface
- No watermark on resized images
- It works quickly on PC and also mobile
Why This Tool Is Better in Some Situations?
Although PicsArt has great powers for creative work, this online resizer wins for on-the-spot jobs:
Simple Tasks Are Faster
Even if your only purpose is resizing an image, this tool will cut down a lot of time. Upload, resize, and download—no project opening, canvas sizing, or export.
Truly Free with No Restrictions
In design apps, a lot of advanced editing workflows may be restricted or disabled without premium upgrades. It is fully featured resizing tool as it is free of cost.
No Editing Skills Required
Naturally, PicsArt has tons of features (which can be a good thing!) It’s overwhelming for newcomers to start with This resizer focuses on the essentials in a no frills manner.
Ideal for Search Engine Optimization & Batch Image Jobs
This tool is so much more efficient than opening a design editor every time you need to resize images like a blogger, developer, or SEO pro does ever day.
PicsArt vs Above Smart Tool — When to Use What?
Use PicsArt when you need:
- Creative edits & effects
- Text, stickers, and design elements
- Social media visuals & branding
The online utility can be used when you have to:
- Fast image resizing only
- Clean output without watermark
- Basic workflow for batch or small jobs
Best Strategy? Use Both!
You can even treat PicsArt as a creativity-driven option and above-mentioned online tool as a time-saving tool.
This means that you have robust editing when you need it — and a lightning-fast image resizing when all you want is the correct size for your image with zero hassle.
Final Thoughts
Resizing images in picsart is an essential skill for content creators, marketers, bloggers and even casual users. Through its easy-to-use interface and robust tools, PicsArt has made resizing a simple, precise, and un-intimidating thing for novice users.
Now you have an entire streamline to resize images like a pro in minutes, for SEO and social media or other design projects.
An experienced technical content writer with expertise in crafting insightful technology blogs. He studies emerging trends, analyzes tools before drafting, and ensures every piece reflects the latest innovations. His content blends clarity, research, and up-to-date technical understanding.