Resizing images is a simple and common task of every user. This includes photographers, designers, marketers, and more. If you need small images for creating websites, modified images for managing social media accounts, or high-quality images for the printing process, Adobe Lightroom is the only solution that provides you with full control over image size while maintaining image quality. This guide will walk you through multiple methods to understand how to resize an image in Lightroom effortlessly. Now, let’s start with further discussions.
Why Image Resizing in Lightroom is Important?
Nowadays, it is essential to learn how to resize an image in Lightroom. But before initiating the process, we need to understand why resizing is important. Here are some reasons:
- Large Images:
- Slow down the speed of websites.
- Always take a large space for storing images.
- Many platforms do not allow uploading large images.
- Resized & Small Images:
- Easily uploaded online on different platforms.
- Look clean and sharp on screens.
- Helps to streamline the workflow.
Always remember, Lightroom does not resize images while editing the picture. It only happens during the export process and offers you complete control at the last stage of the entire process.
Also, you can go through the article on how to resize an image on iPhone.
How to Resize an Image in Lightroom? Best Way
In the following approach, you will go through the complete guide on the exact path to resize an image using the Lightroom application.
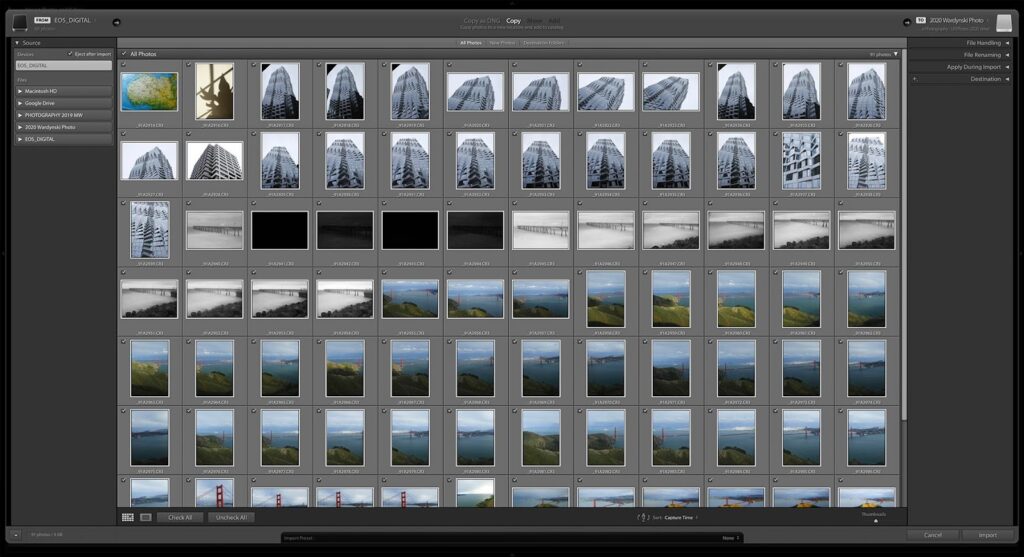
Step 1: Import Image into Lightroom
Allow to import of images into the tool.
- Download & launch Adobe Lightroom (Classic or Cloud version) on your system.
- Hit the import button.
- Browse and select the images you need to import.
- Now, again, click on the import button.
Step 2: Open the Export Panel on PC
Resizing in Lightroom happens in Export Settings:
- Pick the selected images you want to resize.
- Right-click on the chosen image.
- Click on the Export button.
This will open the export dialog box, where the option of resizing becomes live. This is one of the crucial steps to learn how to resize an image in Lightroom.
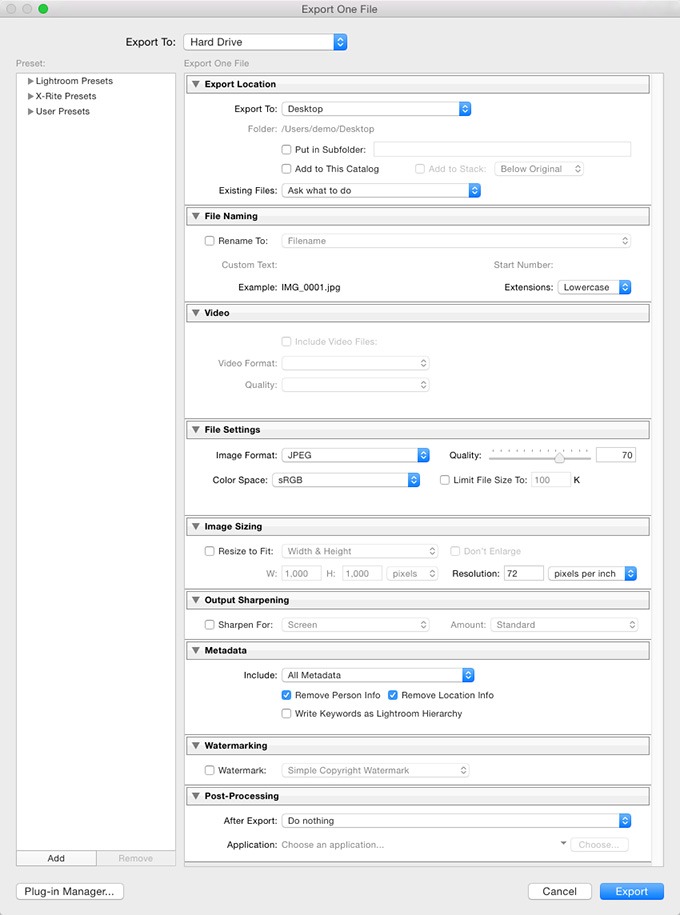
Step 3: Reach to Image Sizing Section
In this section, you will find an option to set the size of the image inside the Export panel. Here, 4 different options are available:
- Resize to Fit
- Height and Width
- Resolution Size
- Option Not to Enlarge
This is one of the major steps that provides control to resize the final image. It allows you to understand this panel and how to resize an image in Lightroom accurately.
Step 4: Use Width & Height to Resize Image
Common Method Used by Many Users:
- Check Resize to change the image size.
- Select Width & Height for the image.
- Add values in pixels.
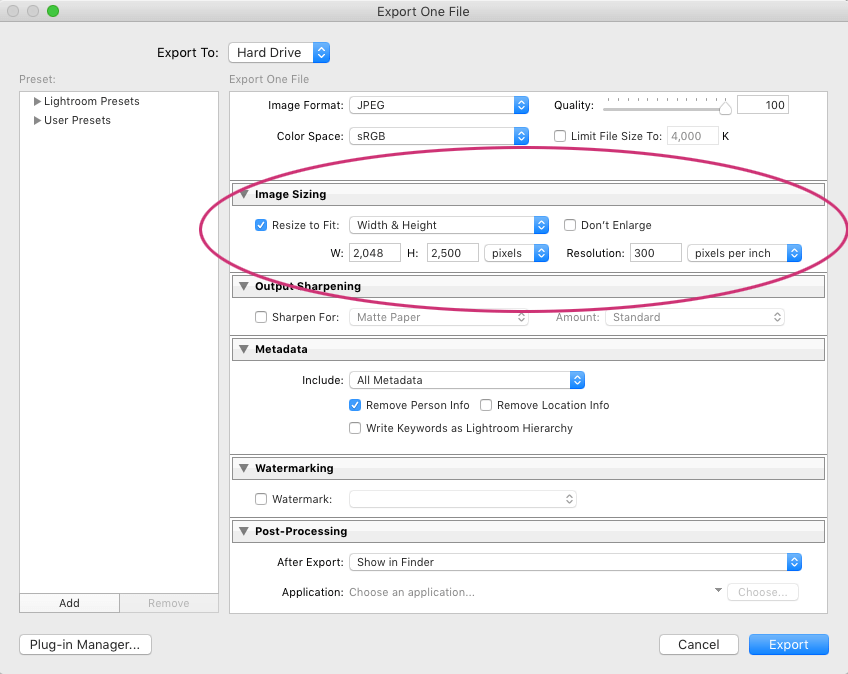
In this step, Lightroom will automatically maintain the ratio and make a good quality image.
Best Use Cases in Which this Option is Best
1. Creating images for websites.
2. Images for posting a blog or article.
3. Creating Thumbnails for Publishing YouTube Videos.
4. Image to Upload on Social Media Apps.
These are the practical way to understand how to resize image in Lightroom, for daily uses.
Step 5: Change the Size of Image for Social Media Platforms
Different platforms support different sizes. Some main sizes are given below:
- Instagram Image: 1080 *1080
- Facebook Image:1200*630
- Twitter(X) Image: 1600*900
Steps to follow:
- Click the option Resize to Fit to start the process.
- Choose both Height & Weight of the image.
- Lastly, put the image in Pixel dimensions according to the platform.
This is one of the best solutions for all social media platforms as it ensures that all images look clean and sharp while uploading. Several users search for how to resize an image in Lightroom only for uploading on these kinds of platforms, and this stands out the best.
Step 6: Use Long & Short Edge Method to Resize Image
This step is based on the long and short edges used for resizing the images. These are used in such cases that are mentioned below:
- For Creating Mixed and Landscape pictures.
- Make the image consistent without cropping
Steps to be followed:
- Start with checking Resize to Fit
- Choose from both the 2 options.
- Select the long or short edge option from the tool.
- Enter the desired value in it.
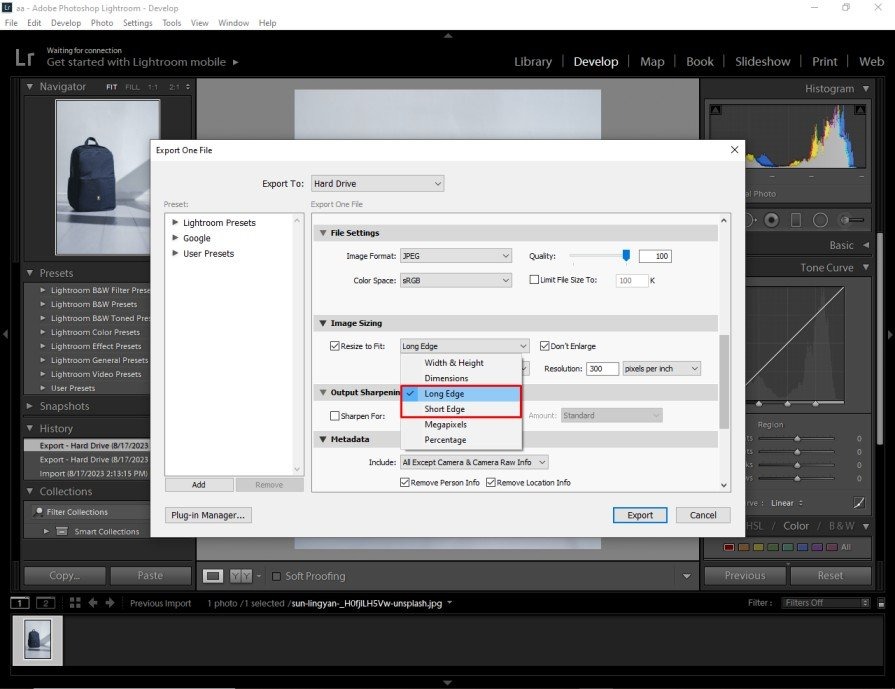
This is a powerful option when understanding how to resize an image in Lightroom for galleries and collections.
Step 7: Set The Resolution Appropriately (Detailed PPI)
This option help users to know how resolution can sharp your image that appears in print, not only on screens. Here are some suggested settings that need to be followed:
- Social media & Web Settings (72 or 96 PPI)
- Print (300 PPI)
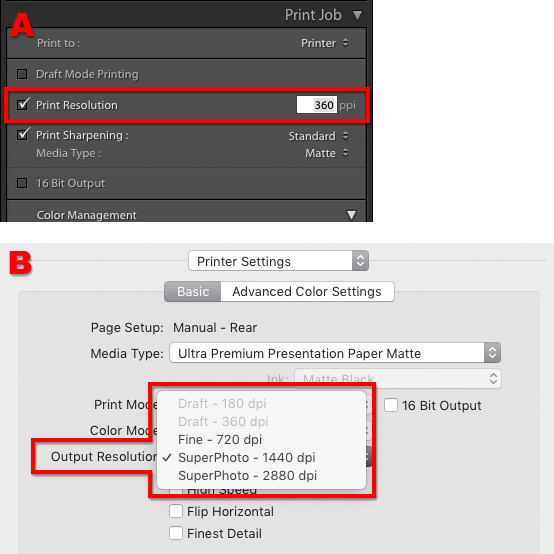
This option not only resizes the image, but it also works seamlessly with pixel dimensions. This helps to avoid confusions when learning about how to resize image in Lightroom accurately.
Step 8: Use Option Do Not Enlarge Images for Better Quality
Always remember to check Do Not Enlarge. This is important for the following reasons:
- It removes Pixel stretching
- Always preserve the sharpness of the image.
- It prevents blurry exports.
This maintains that Lightroom not only reduces and increases the size of the image. It is mainly helpful for all professionals who work on this when applying how to resize an image in Lightroom without losing sharpness and quality of the picture.
Step 9: Export the Resized Picture
- Select the desired file format (JPEG Recommended)
- Set the Quality of Image (70-85 web, 100print)
- Lastly, click on the Export button.

Finally, after completing the whole process, you can save the resized image in your selected folder. This streamlines the workflow of how to resize an image in Lightroom from starting to ending. Here are some common mistakes users usually make, so follow the instructions to avoid these kinds of mistakes:
- Do not export images during the resizing process.
- Do not forget to check Resize to Fit.
- Avoid using high resolution for the web.
- Enlarging small pictures.
Resize Individual or Multiple Images in One Go Without Lightroom
If Adobe Lightroom is not installed and needs a quick solution, then here is the Oualator Image Resizer that works effortlessly as an alternative option for resizing images online. Lightroom is an amazing solution, but Oualator is an ideal choice for both professionals and beginners, that provide instant solutions without installing any software. It works on your local system and allows users to edit easily, shared systems or low-spec devices. Below are the following steps:
- Go to the official website on your system.
- Click on the upload image option and choose one or multiple images.
- Enter the width and height values as per your requirements.
- Enable the option Maintain Aspect Ratio to avoid distortion.
- Hit on Resize Image to start the process.
- Finally, download the resized image to complete the process.
Why Oualator is More Useful then Lightroom?
- Support resizing of images in bulk.
- Works efficiently on low-bandwidth connections with less upload time.
- No need to login account details or Adobe subscription required.
- Allow users to make changes at the last minute before publishing.
- Fully compatible with desktop and mobile browsers.
This robust online image resizer is the best alternative option when your aim is speed and security rather the editing images. It is mainly useful for creators, bloggers, and marketers who need clean, perfectly sized images.
Concluding Words
In this complete article, we understand how to resize image with Lightroom. This is essential for photographers and content creators. Lightroom makes the whole process of resizing simple and accurate. Once you understand completely, you can quickly resize the pictures according to your choice for any purpose. Try to practice various resize options. This will help to make your work smoother and professional.
An experienced technical content writer with expertise in crafting insightful technology blogs. He studies emerging trends, analyzes tools before drafting, and ensures every piece reflects the latest innovations. His content blends clarity, research, and up-to-date technical understanding.
I love your blog.. very nice colors & theme. Did you make this website yourself or did you hire someone to do it for you? Plz answer back as I’m looking to create my own blog and would like to know where u got this from. kudos